So, here you are, about to launch your first cold email campaign.
Your domains are set up, your mailboxes are configured, your lead list is ready, and your sequence is written.
But before you hit Send, one question is probably bugging you: “How do you actually know your emails are ready to land where they should?”
If you are travelling in the same boat then you're in the right place!
This guide walks you through the 7-step deliverability check I run before every campaign launch, the tools I use, and how to spot the gaps that could otherwise cost you before your very first send.
Why You Need to Check Email Deliverability Before You Launch a Cold Email Campaign
Most cold email guides treat deliverability as something you fix after things go wrong.
That is backwards. A pre-launch audit costs an hour. Recovery after a bad launch costs weeks.
Here is why running the check upfront matters so much:
Avoid burning a lead list you spent weeks building: One bad launch on a broken setup can wipe out thousands of leads that will never open a second email from your domain again.
Catch silent authentication failures early: Most SPF, DKIM, and DMARC misconfigurations show no obvious signal. They only surface when Postmaster reputation drops two weeks later.
Spot inherited blacklist listings before they hurt you: Recycled domains and shared IPs often come with history you did not create but still pay for. A pre-launch scan catches this in minutes.
Launch from a known-good sender reputation: Postmaster Tools and heat score both need historical data to be useful. Setting them up before your first send means you have a baseline from day one.
Test how AI filters read your email before recipients do: Gmail's Gemini and Outlook's Copilot summarize your email before it gets opened. If the summary reads as sales, reply rates crater before the click.
Save weeks of recovery time: Domain reputation drops take three to six weeks to recover. Avoiding the drop is orders of magnitude cheaper than fixing it.
Save real money on infrastructure: Debugging a broken setup after launch means paused campaigns and idle infrastructure. Getting it right upfront means every mailbox you paid for is actually sending.
What you get in return is confidence. When you hit send on your first campaign, you know the technical setup is clean, the infrastructure is trusted, and the deliverability numbers are on your side.
That is the whole game.
The 7 Steps to Follow When Checking Your Email Deliverability
Here is the exact sequence I run before every cold email launch.
Each step builds on the last, so follow the order. Skip a step, and the checks that come after it give you unreliable readings.
Step 1 — Verify Your SPF, DKIM, and DMARC Records
The first thing I check is whether my SPF, DKIM, and DMARC records are set up correctly. This is the foundation of every other check on the list. If authentication is broken, inbox providers flag the domain as untrusted before the email even hits a spam filter. Nothing else matters until this passes.
Here is what each record does, in plain language.
1. SPF (Sender Policy Framework) is a public list published in your DNS. It tells receiving servers which servers are allowed to send email on behalf of your domain. When Gmail receives an email claiming to be from you, it looks up your SPF record. If the sending server is on the list, SPF passes. If not, you look like a spoofer.
The most common SPF mistakes at setup:
Multiple SPF records on the same domain (which invalidates all of them)
More than 10 nested DNS lookups (SPF caps at 10 and silently breaks)
Forgetting to add your sending infrastructure provider to the record
2. DKIM (DomainKeys Identified Mail) is a cryptographic signature stamped on every email you send. The receiving server pulls your public key from DNS and verifies the signature matches. If it does not match, the email is treated as unsigned. That is a huge deliverability hit right from your first send.
Here is a detail most setup guides skip. DKIM keys should be 2048 bits, not 1024. Google now flags 1024-bit keys as weak, and a lot of ready-made setups still default to 1024. Check the key length before your first campaign.
3. DMARC is the enforcement layer that ties SPF and DKIM together. It tells receiving servers what to do when authentication fails. There are three policies:
p=none — monitor only, do nothing when authentication fails
p=quarantine — send failing emails to spam
p=reject — block failing emails outright
For a new setup, the right progression is:
Start at p=none for the first two weeks to collect DMARC reports
Move to p=quarantine once alignment is clean
Move to p=reject after another two clean weeks
Jumping straight to p=reject is risky because you can end up blocking your own legitimate mail. Take the two-week ramp instead.
One more thing worth flagging. Google's 2024 bulk sender guidelines made DMARC mandatory for anyone sending more than 5,000 emails per day to Gmail. If you plan to scale past that in the first month, DMARC has to be live from day one.
Check alignment, not just presence. The silent killer of most new setups is an SPF record that "passes" a raw check but does not align with the From domain on your actual sent emails. DMARC catches this. If your From address is [email protected] but SPF only covers subdomain.yourdomain.com, DMARC flags the alignment as failed even though SPF looks fine in isolation. Run a DMARC alignment check, not just an SPF lookup.
Verify authentication on every mailbox, not just the domain. Setups with 20+ mailboxes across multiple domains often have one or two mailboxes where authentication was configured incorrectly. Test a sample mailbox from each domain before launch, so you catch the outlier before it drags the whole campaign down.
Step 2 — Check Your Domain and IP Against Blacklists
Next, I check whether the sending domain and IP are listed on any major blacklist.
Blacklists (also called RBLs, or Real-time Blackhole Lists) are databases of domains and IPs known for spam. Landing on one silently kills your deliverability with entire ISPs at a time. And nobody notifies you when it happens.
Here is where a lot of new senders get caught off guard:
Recycled domains often carry blacklist history from previous owners
Shared IPs inherit reputation from every sender on the same IP
Fresh domains can still land on lists if bought from questionable resellers
Not all blacklists carry equal weight. Some are barely consulted. Others get you blocked at Gmail within an hour of listing. The ones that matter most for cold outreach:
Spamhaus (SBL, XBL, PBL, DBL) — industry standard, blocks at Gmail and most major providers
Barracuda Reputation Block List — kills Outlook and Microsoft 365 deliverability
SORBS — used by many smaller ISPs
SpamCop — complaint-driven, easy to land on with a reused IP that has bad history
Blacklists work on two levels: your sending domain and your sending IP. Both need clean bills of health before you launch.
A domain listing usually points to bad content (spam trap hits, malicious links, high complaint rates)
An IP listing usually points to sending behavior (volume spikes, poor authentication, other senders on a shared IP behaving badly)
For the big ones, Spamhaus and Barracuda offer their own free lookup tools
What to do if you are already listed before launch:
Domain listed — the domain was previously used for spam and recycled. Do not send from it. Ask the reseller for a replacement, or switch to a fresh domain from a trusted provider.
Shared IP listed — the IP is not yours to clean up. This is a strong signal to move to dedicated IPs before launching at scale.
Fresh domain listed — rare, but usually a sign the reseller is running poor-quality inventory. Switch providers.
This breakdown of how blacklists impact IP reputation covers why shared IP listings compound so fast, and why it is often faster to move than to wait for a shared pool operator to fix it.
Pro tips:
Verify domain history before you buy. If you are buying domains from a reseller, ask specifically whether the domain was previously registered and used. Recycled domains with bad history are the single most common source of pre-launch blacklist listings. A quick WHOIS history lookup tells you whether the domain was ever registered before.
Scan weekly after launch too. Blacklist listings are silent. Nobody notifies you. Running an MXToolbox scan every Monday morning catches new listings in the first 24 hours, which is the difference between a quick delist and weeks of recovery work.
Step 3 — Run an Inbox Placement Test
Once authentication is verified and blacklists are clear, an inbox placement test will finally give me meaningful data.
Running this earlier is pointless, because a failing SPF or a blacklist listing skews every result. This is why order matters so much.
An inbox placement test tells you where your emails will actually land before you send them at scale. Not what you hope. What Gmail, Outlook, Yahoo, and iCloud actually do with them.
Here is how the test works:
You send your exact campaign email (subject, body, links, images, all of it) to a set of "seed inboxes" spread across major providers
Each seed reports back where your email landed: Primary, Promotions, Updates, Spam, or blocked
You get a full picture of placement broken down by provider
Why this matters more than any other real-time check comes down to timing. Open rates are a lagging indicator. By the time your open rate tanks, the damage is already done. A placement test catches placement problems before you send to real leads, which means you can fix the issue on a seed test instead of a paying lead list.
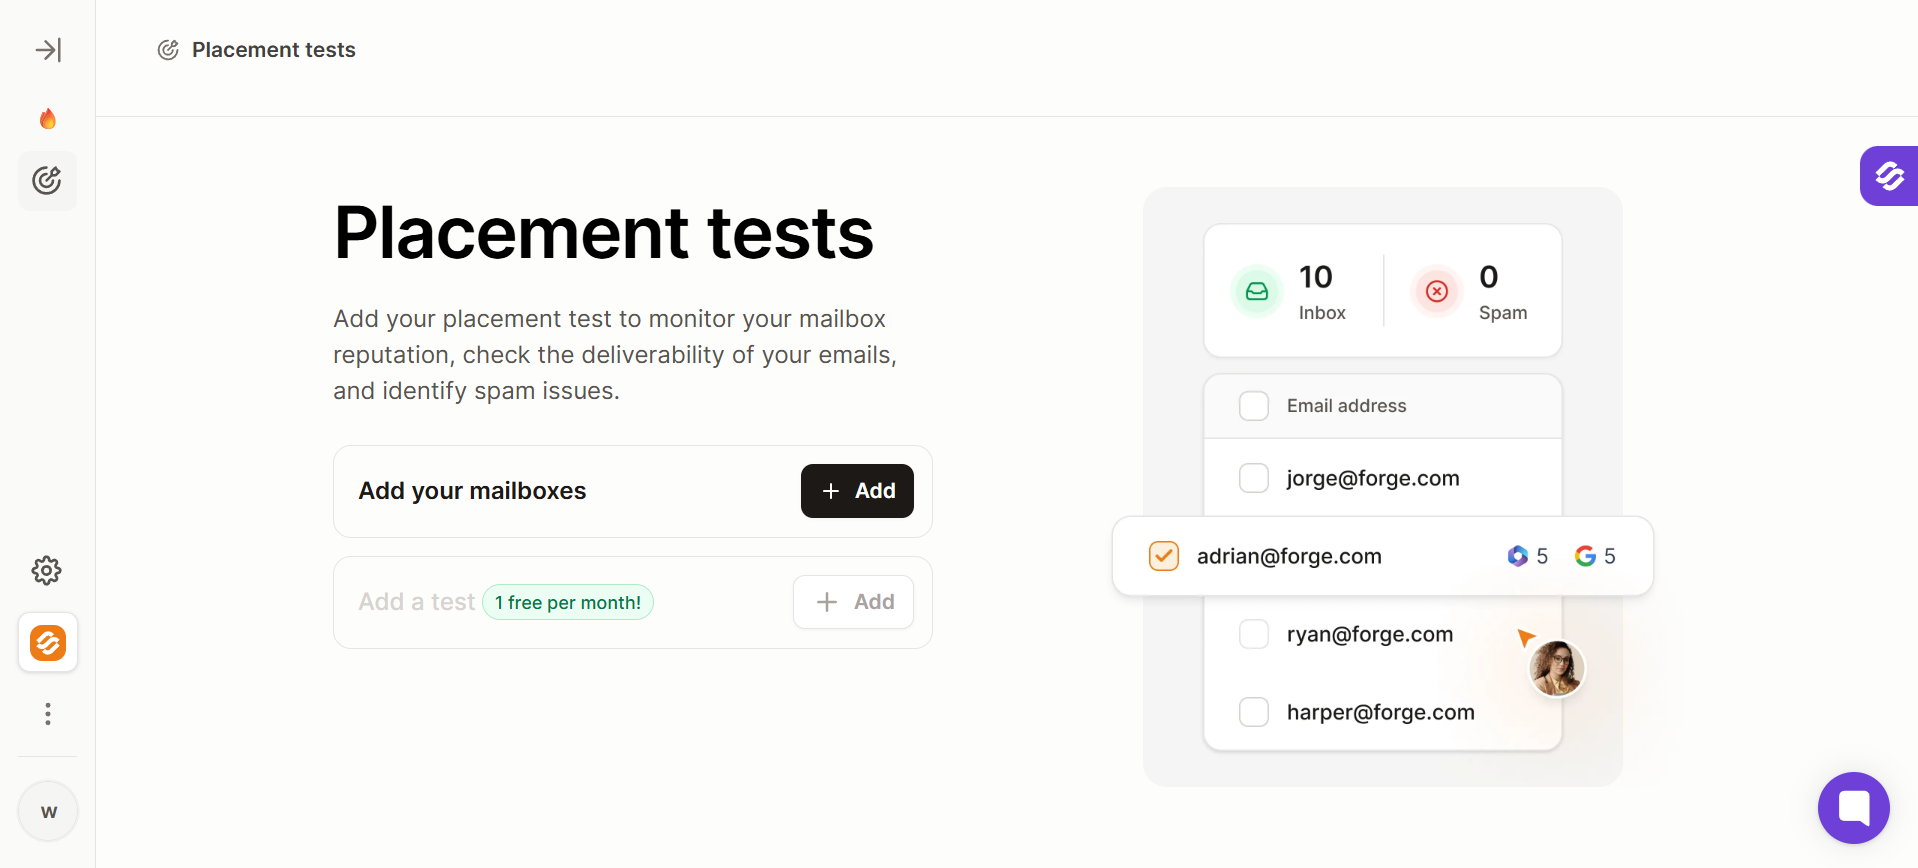
You get a free placement test on signup and see per-provider placement in one dashboard. The report also flags authentication drift the moment it happens, which is a useful cross-check even after step 1.
Reading the report properly comes down to three numbers:
Raw placement percentage — if less than 80% of seeds land in Primary or the main inbox tab, something is broken downstream (usually content or sending patterns). Do not launch yet.
Provider split — Gmail and Outlook use different filtering models. A test that passes Gmail but fails Outlook usually points to a DMARC record Outlook is stricter about, or a shared IP with a bad Microsoft reputation.
Folder mix — landing in Promotions is not always terrible. For newsletters, it is often the intended folder. But for cold outreach, Primary is the only folder that reliably gets opened.
Pro tips:
Test the exact email you plan to send. Every character, every link, every image. A lot of teams run a seed test on a shorter "cleaner" version, watch it pass, then add the tracking link and unsubscribe footer for the real send and half of it lands in spam. Test what you actually plan to send. No shortcuts.
Test at the exact time you plan to launch. Gmail and Outlook filter more aggressively at peak business hours. An email sent Tuesday 10am gets scanned harder than one sent Saturday 2am. Running the test at the actual send time is the only way to get an accurate reading of what will happen when you launch.
Step 4 — Set Up Google Postmaster Tools and Microsoft SNDS
After the placement test, I make sure Postmaster Tools and SNDS are set up and ready to start collecting data the moment sending begins. T
hese are two of the most underused resources in cold email. Free, official, and they tell you what those providers actually think of your domain and IP.
Setting them up before your first send means you have monitoring in place from day one. Not weeks after damage starts showing up.
Microsoft shows inbox placement rate, complaint rate, and IP filter results
You need control over the IP to register it — shared IPs cannot be registered under your account
That last point about SNDS is worth calling out. If Microsoft-hosted domains (Outlook, Office 365) are a big part of your target list, and you cannot register the IP because you are on a shared setup, that alone is a strong reason to consider dedicated infrastructure.
Four metrics to watch once data starts flowing:
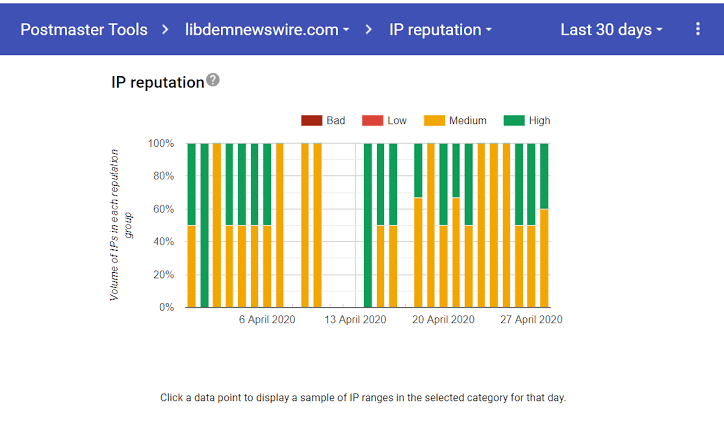
Domain reputation — graded Bad, Low, Medium, or High. Anything below High is a warning. Below Medium and emails land in spam by default.
IP reputation — same scale. Matters more if you are on a dedicated IP.
Spam complaint rate — keep under 0.10%. Google penalizes anything above 0.30% severely. Above 0.50% and you are effectively blocked at Gmail.
Authentication rate — should be 99% or higher. If it drops, there is an SPF or DKIM misalignment somewhere in your infrastructure.
Here is what most guides get wrong about Medium reputation. Medium sounds like a passing grade. It is not. It is a warning that you are on thin ice.
At Medium, Gmail is still delivering most emails but is watching. One bad campaign, one complaint spike, one send to a poorly cleaned list, and you drop to Low. Then Bad.
A domain can drop from Medium to Low in three days, and recovery back to High takes six weeks of capped volume and careful ramping.
The goal from day one is to keep reputation at High, not to hit High later. For ongoing tracking beyond Postmaster's daily lag, this IP reputation monitoring for cold email covers what to watch daily once you start sending.
Microsoft SNDS shows something Google does not: the IP filter result color code.
Green — delivering to inbox
Yellow — some filtering happening, investigate
Red — mostly blocked, pause sending immediately
That color code is a live signal of what Microsoft is doing with your emails. If SNDS turns Yellow or Red after you start sending, pause outbound to Microsoft-hosted domains immediately. Sending more while Red just accelerates the damage.
Pro tips:
Register both before your first send. Postmaster and SNDS need time to accumulate data. Registering them before you launch means you have a baseline from day one, not weeks after your first campaign. Otherwise you have no way to know whether a drop is normal noise or a real problem.
Correlate Postmaster with your heat score once sending starts. Postmaster is the inbox provider's verdict. Heat score is the underlying sender health. When both agree, you are safe. When they disagree, Postmaster is usually the lagging signal and a good warmup platform like Warmforge caught the drop first.
Step 5 — Warm Up Your Domains and Track Your Heat Score
Next, I check whether the domains and mailboxes are warmed up enough to launch.
If your setup is new (and if this is your first cold email campaign, it almost certainly is), warmup is not optional.
Here is why warmup matters:
New domains have no sender reputation: Gmail treats them as unproven senders and defaults to spam
New mailboxes have no engagement history: They need simulated activity before real cold sending
Skipping warmup means starting your campaign at a permanent disadvantage: Recovery from a bad first-week reputation takes weeks
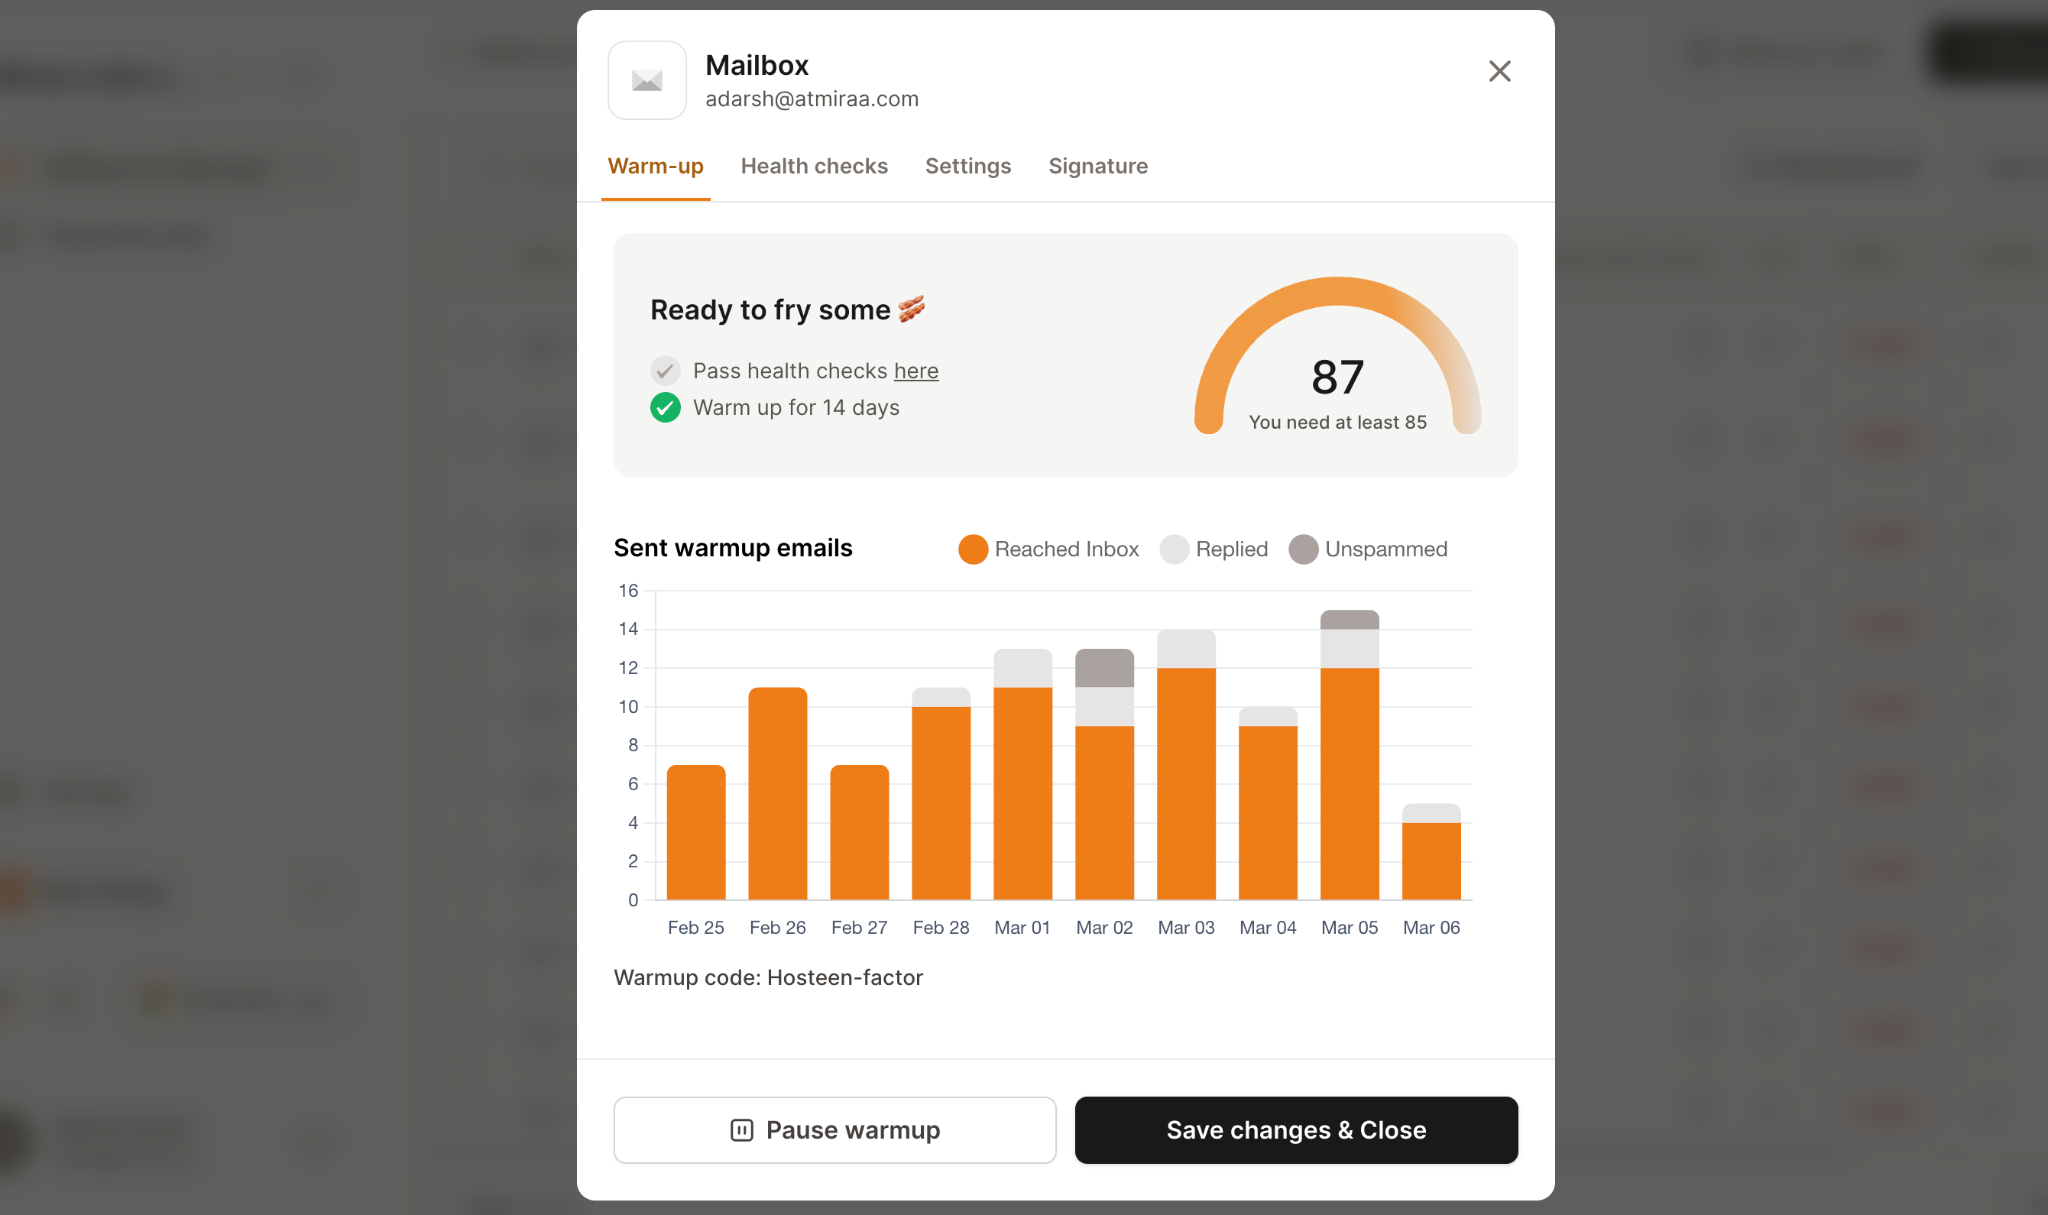
Warmup builds sender reputation over 14 days minimum by simulating real email conversations across a peer network.
Your mailboxes send emails to other verified mailboxes, which reply, mark as important, and move messages to Primary. Inbox providers watch these engagement patterns and start treating your domain as a legitimate sender.
Heat score is the metric to watch during warmup. It combines multiple signals into a single moving number:
Inbox placement rate over time
Warmup engagement quality
Reply behavior
Spam folder recovery
The target is 85+ and holding steady.
I track it on Warmforge, which shows the score updating daily. Before your first campaign, wait until heat score hits 85+ across every sending domain. Sending before that is sending into a headwind.
Two things worth calling out for anyone new to warmup:
Warmup is not a one-time setup step. Once you launch, keep warmup running in the background even for active mailboxes. Sender reputation decays if warmup patterns stop.
Prewarmed mailboxes skip the 14-day wait entirely. Infraforge and a few other providers offer domains and mailboxes that come already warmed with clean IPs and clean DNS. If speed to launch matters, this is the fastest path.
For a full walkthrough on the daily ramp, engagement targets, and volume progression during warmup, this best practices guide for warming new domains is worth reading before you spin up any new domain.
Three warning signs to watch for once sending starts — these predict deliverability collapse before Postmaster catches it:
Reply rate drops before open rate — emails are landing but going to Promotions where people are not seeing them fast enough to reply
Bounce rate creeps above 3% — hard bounces damage domain reputation faster than almost anything else
Warmup engagement drops inside the peer network — the earliest signal that reputation is degrading upstream
Pro tips:
Do not launch before heat score hits 85+. It sounds obvious, but a lot of teams get impatient at day 10 or 11 of warmup and launch early. Every time, the deliverability numbers pay for it. Wait for the score. Fourteen days of patience saves months of recovery.
Keep warmup running at 20 to 30% of daily volume after launch. A common mistake is warming for 14 days, then switching entirely to cold campaigns. Reputation decays inside a week. Ongoing warmup maintains the engagement patterns Gmail uses to grade sender reputation over the long haul.
Step 6 — Test How AI Filters Handle Your Emails
After warmup checks out, I test how AI filters read the emails. This is the check almost no other guide covers, and in 2026 it is one of the highest-impact ones you can run before your first send.
Gmail's Gemini and Outlook's Copilot are not just spam filters anymore. They summarize incoming emails, categorize them by intent, and surface a preview to the reader before the email is even opened.
So what the AI says about your email matters as much as whether the email lands in the inbox. Two summaries for the same email can produce completely different reply rates:
"Sales outreach asking for a meeting" → reply rate craters before the recipient even opens the email
"Question about your current CRM setup" → reply rate holds or improves
The AI is now a gatekeeper between the inbox and the click. Testing this before launch means you know exactly what your recipients will see.
How to run the AI filter test:
Send your email to a seed Gmail inbox and open the AI summary in Gmail
Do the same for a Microsoft 365 inbox and check the Copilot preview
Read what the AI says the email is about
If the summary sounds like a sales pitch, rewrite. If it sounds like a real question, launch.
Three levers to change if the AI flags you as sales:
Subject line — AI filters weight this heavily. "Quick question about your outbound stack" reads as peer conversation. "Boost your conversions by 300%" reads as sales in one pass.
Opening line — long sales-y openers get flagged. A short, specific opening that references the recipient's context reads as human. Changing just the first two sentences can move the Gemini summary from "sales pitch" to "consulting inquiry" and double reply rates.
Links and images — emails with tracked links, images, and marketing footers get downgraded to sales intent. Strip them from your first outreach touch. Add them back only in later steps once you have engagement.
Signals AI filters watch for:
Buzzword density — words like "revolutionize," "cutting-edge," "game-changer" get flagged as marketing
Question-to-statement ratio — real peer emails ask questions, sales emails make statements
Personalization signals — references to the recipient's company, role, or recent activity read as human research
Sentence complexity — overly polished sentences read as templated
Pro tips:
Read the AI summary like a busy CTO. Pretend you are a busy CTO. The AI just handed you a two-line summary of an email in your inbox. Would you click? If no, no amount of subject line testing will fix a body that reads like sales copy underneath. Rewrite the body first, then re-test before launch.
Personalize at the sentence level, not the token level. First-name insertion is not personalization to AI filters. Neither is company name insertion. Both are trivially detectable as templated. Real personalization looks like referencing a recent post the recipient made, a hire their company announced, or a shift in their industry.
Step 7 — Confirm Your Sending Infrastructure Is Built for Cold Outreach
The last thing I check is whether the infrastructure itself is built for cold outreach, or whether it is a general-purpose email setup being asked to do a job it was not designed for. If the first six steps all come back clean, congratulations.
Your setup is technically sound and you can launch.
But if any of them keep coming back yellow or red no matter what you fix, that is a signal the infrastructure itself is the problem.
And launching from broken infrastructure means starting the campaign at a permanent disadvantage.
Here is the hard truth for anyone about to launch.
If the infrastructure keeps failing your pre-launch checks, the fastest path forward is not more debugging. It is switching to infrastructure built for cold outreach from the start.
Shared IPs vs dedicated IPs — what to check:
On a shared IP, you inherit the sending behavior of every other sender on that IP
If one of them sends to a spam trap, you all take the hit
If one of them gets listed on Spamhaus, your emails start bouncing too
For a low-volume sender (under 500 emails per day), shared IPs are fine.
For anyone planning to send more, or running multiple campaigns for multiple clients, shared IPs cap your ceiling from day one. This breakdown of dedicated IPs vs shared IPs covers the volume thresholds in detail.
Dedicated IPs give you the reputation you build. Good sending behavior compounds into better inbox placement over time. Bad behavior costs you, but at least you know exactly why.
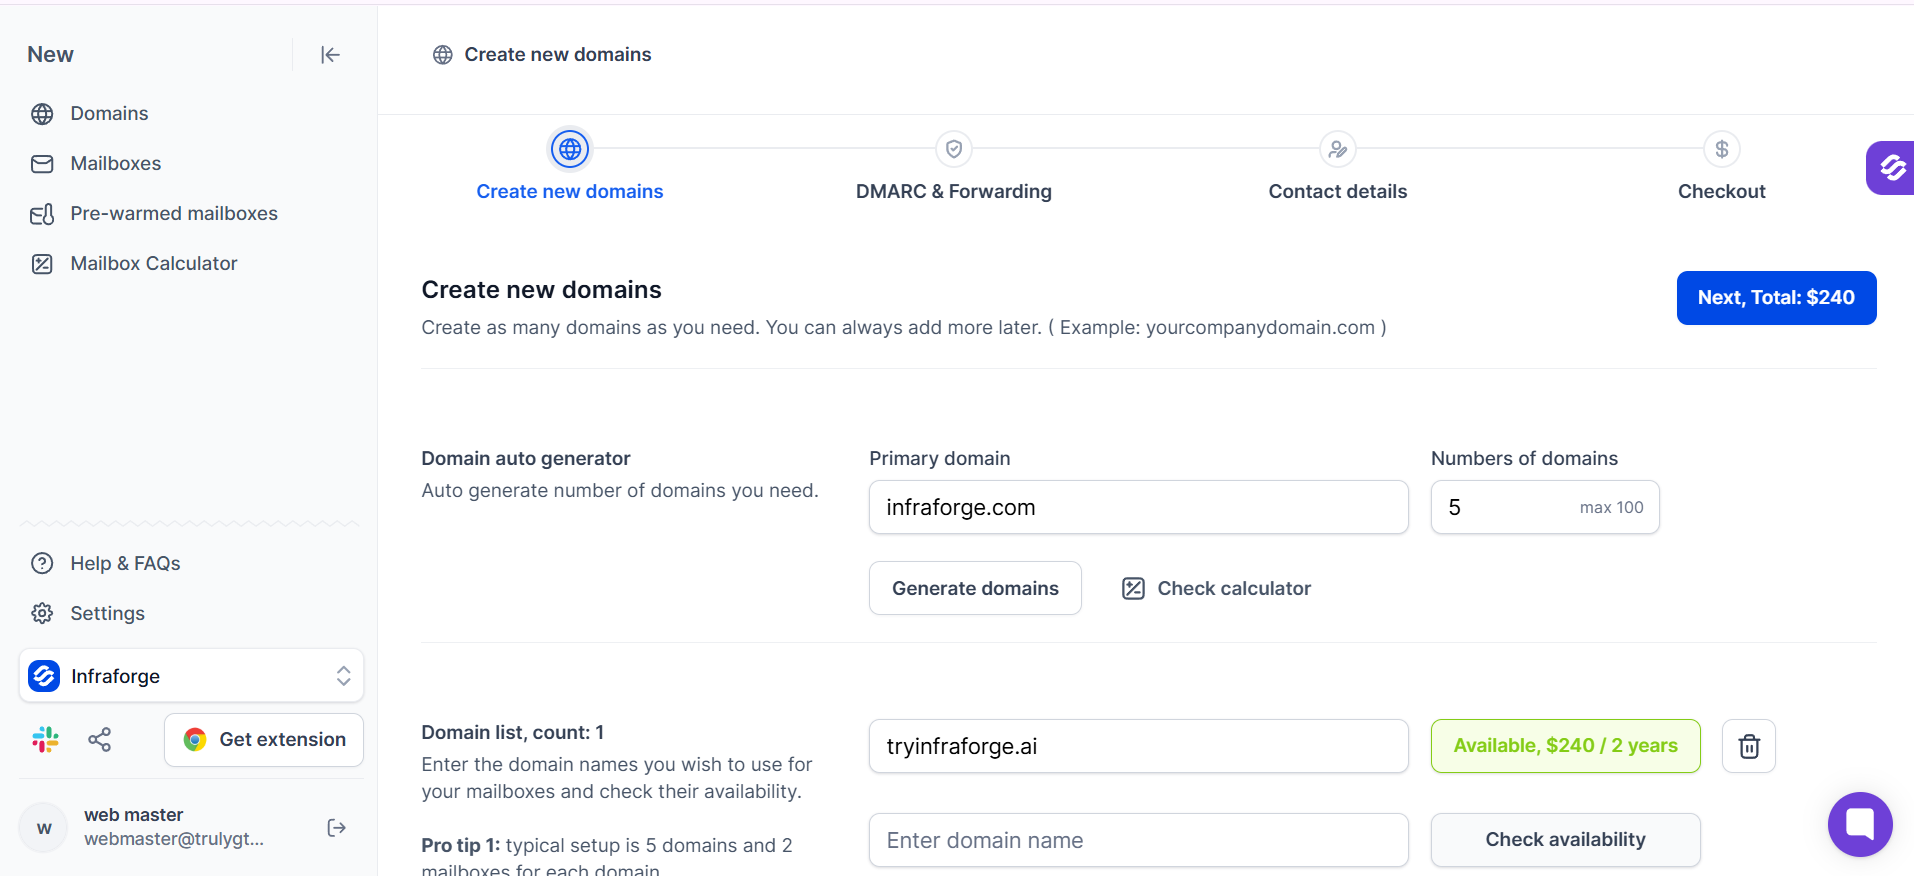
Infraforge gives you a dedicated IP with automated DNS setup out of the box. That means:
SPF, DKIM, DMARC, and PTR records configured correctly the first time
No manual DNS panel work
No missing records
No misalignment gaps
That last point matters because DNS is where most first-time infrastructure failures happen. If you are managing 20+ domains for launch, updating DNS records manually is a full-time job.
Miss one DKIM key rotation across a subset of domains, and you have a silent deliverability leak that shows up in Postmaster three weeks in. This bulk DNS updates guide covers what to automate first.
Prewarmed infrastructure is the other advantage worth calling out.
Traditional warmup takes 14 days. During those 14 days, you are not sending real campaigns from new mailboxes. That is 14 days of lost pipeline every time you spin up a new domain.
Infraforge offers prewarmed mailboxes for immediate sending:
Domains and mailboxes come already warmed
Clean IP and clean DNS
Skip the 14-day wait
Start sending on day one
Here is why this matters for your launch. Say you want to send 5,000 emails in your first week to test your sequence:
Traditional path — buy mailboxes, spend 14 days warming, then start sending. Two weeks before you have any data on what works.
Prewarmed path — buy prewarmed mailboxes from Infraforge, start sending on day one. Two weeks of data gained.
When you multiply that across an entire launch, the difference is not close. And when your setup is fighting deliverability problems before you even send the first email, the smarter move is starting on trusted infrastructure rather than patching your way through.
Five signals it is time to launch from purpose-built infrastructure:
Pre-launch audits keep coming back with the same issues after fixes
You are on a shared IP and the IP is already showing up on blacklist scans
Your team is spending more time on DNS and mailbox debugging than on the sequence itself
You need to scale volume in the first 30 days and cannot afford a 14-day warmup lag
You are launching from recycled domains or shared IPs with unknown history
If two or more of those are true, starting on Infraforge is the faster path to a clean launch.
Do not launch from infrastructure that already fails your audit. If any check above is red on the setup side and you cannot fix it cleanly, the setup itself is the problem. Starting your first campaign on broken infrastructure means every campaign after that fights the same drag. Fixing infrastructure before launch costs a day. Fixing it after launch costs a quarter.
Buy trusted infrastructure instead of assembling your own for launch. First-time setups almost always miss something (a DKIM key length, a PTR record, an alignment gap). Trusted infrastructure like Infraforge handles all of that on day one, so your first campaign launches from a clean, verified sender profile rather than an untested one.
What to Do If Your Pre-Launch Check Fails
Not every failed check means you need to rebuild everything. Match the fix to the failure type.
1. Authentication failure
SPF, DKIM, or DMARC records are missing, misaligned, or malformed
Go back to step 1, fix the record, wait for DNS to propagate (15 to 30 minutes)
Re-run the check before moving on
2. Reputation warning
Postmaster or heat score reads low before you have even sent anything
Usually means domains or IPs came with baggage (recycled history, shared IP with bad neighbors)
Extend warmup on Warmforge by another 14 days, or switch to fresh domains from a trusted provider
3. Infrastructure failure
Checks keep coming back red no matter what you fix
The infrastructure itself is the bottleneck
Move to dedicated IPs with automated DNS, or buy prewarmed mailboxes and start sending immediately
Scale your cold outreach without getting flagged as spam. Create thousands of domains and mailboxes with dedicated IPs and automated DNS setup. Or get prewarmed infrastructure for immediate sending, skipping the 14-day warmup entirely and launching on day one.
1. How long should the pre-launch deliverability check take?
A first-time full audit takes 2 to 3 hours to run through properly. Weekly audits after launch take about 30 minutes once you have the process down.
2. What is a good spam score for cold email?
A "spam score" from a single seed test is a starting point, not the full picture. Aim for a clean pass across authentication, blacklist status, and content checks. But trust real inbox placement tests over any single spam score. Placement is what matters at launch.
3. Can I check email deliverability without sending an email?
Partially. You can check SPF, DKIM, DMARC, and blacklist status without sending anything. But actual inbox placement requires a real send to seed inboxes. There is no substitute for it before launch.
4. How long does warmup take before I can send my first cold email?
14 days is the standard minimum. Some teams push it to 21 days for safety. Prewarmed mailboxes from a trusted provider skip the wait entirely and are ready to send on day one.
5. Why do my emails land in Promotions instead of Primary during seed tests?
Usually one of three reasons: heavy use of tracked links, image-heavy design, or marketing-style CTAs. Gmail's algorithm reads these as commercial intent. Strip them from cold outreach and Primary placement usually returns.
6. What is the difference between an email warmup and a deliverability check?
Warmup builds sender reputation over time by simulating engagement. A deliverability check audits the state of that reputation. You warm up new domains. You check whether the setup is ready to launch.
7. Does Warmforge work with Infraforge?
Yes. The Forge stack is designed to work together. Domains and mailboxes from Infraforge feed into Warmforge for warmup and monitoring, and into Salesforge for outreach.
8. Should I use shared or dedicated IPs for my first cold email campaign?
Under 500 emails per day, shared IPs are fine. Above that, or if the shared IP already shows up on any blacklist scan, dedicated IPs are the safer choice for launch.
9. What is the fastest way to launch a cold email campaign without hurting deliverability?
Buy prewarmed mailboxes from a trusted infrastructure provider. Traditional warmup adds 14 days of lag before the first campaign. Prewarmed infrastructure lets you launch on day one with a clean, verified sender profile.